Record your first workout
Start a complete session from a plan, template, or exercise selection; record sets, review Summary, and finish into History.
By the end: you will have a completed workout under the intended athlete in History. This guide uses Training → Workout, which supports a complete session with or without a device.
1. Check the organization and athlete
Choose the organization where the training should live. In personal mode, the workout is yours. In Coach Mode, select the roster with the pencil, then select the avatar of the athlete performing the next set.
Check units before entering load. You can record ordinary exercise values without an encoder. For measured work, connect and activate the appropriate device.
2. Open Workout and choose a starting point
If you have an active workout, the app restores it rather than showing an empty start screen. Resume it or finish/discard it before treating this as a new session.
With no active workout, choose:
| Option | What loads |
|---|---|
| Today’s workouts, when listed | A scheduled workout available today for the selected athlete. |
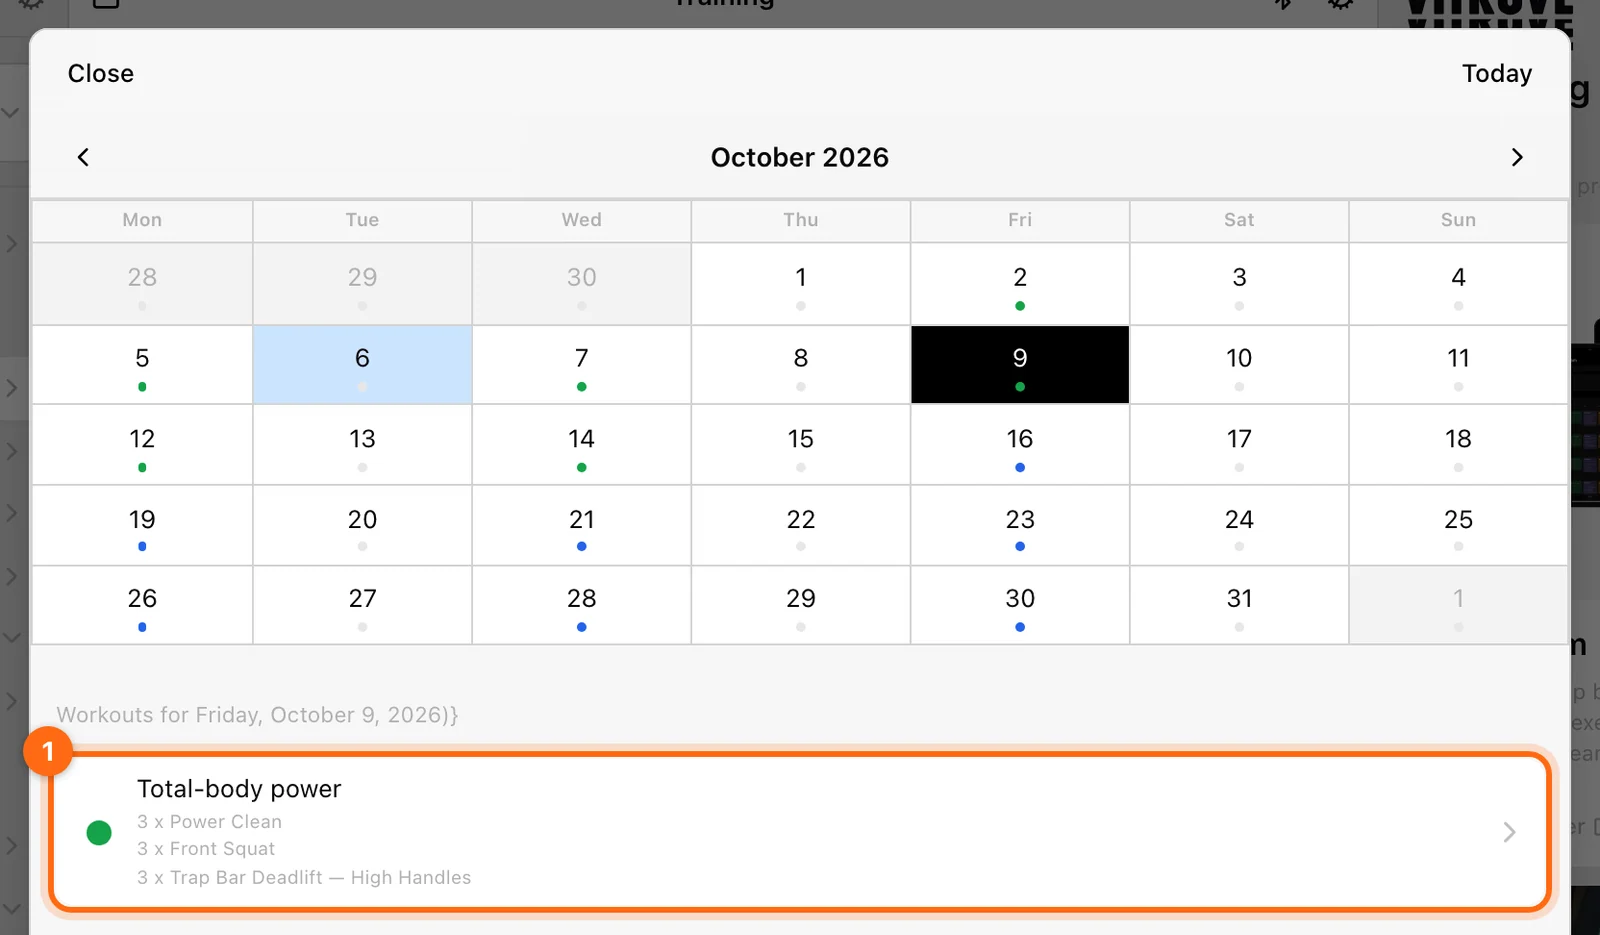
| Calendar | A scheduled session you choose from the calendar. |
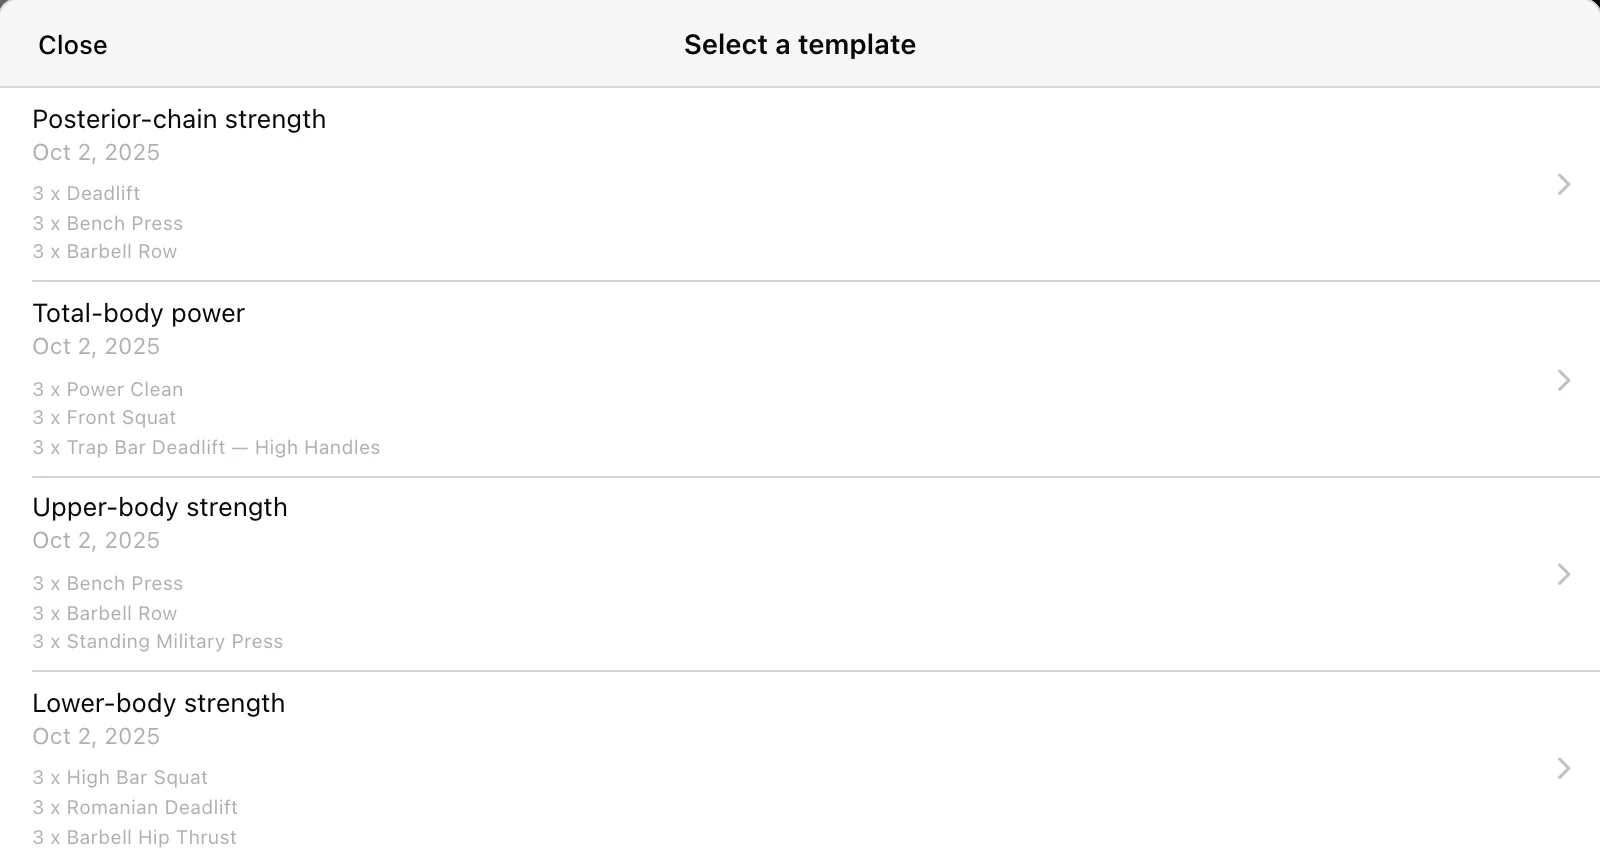
| Use a template | A reusable workout structure. |
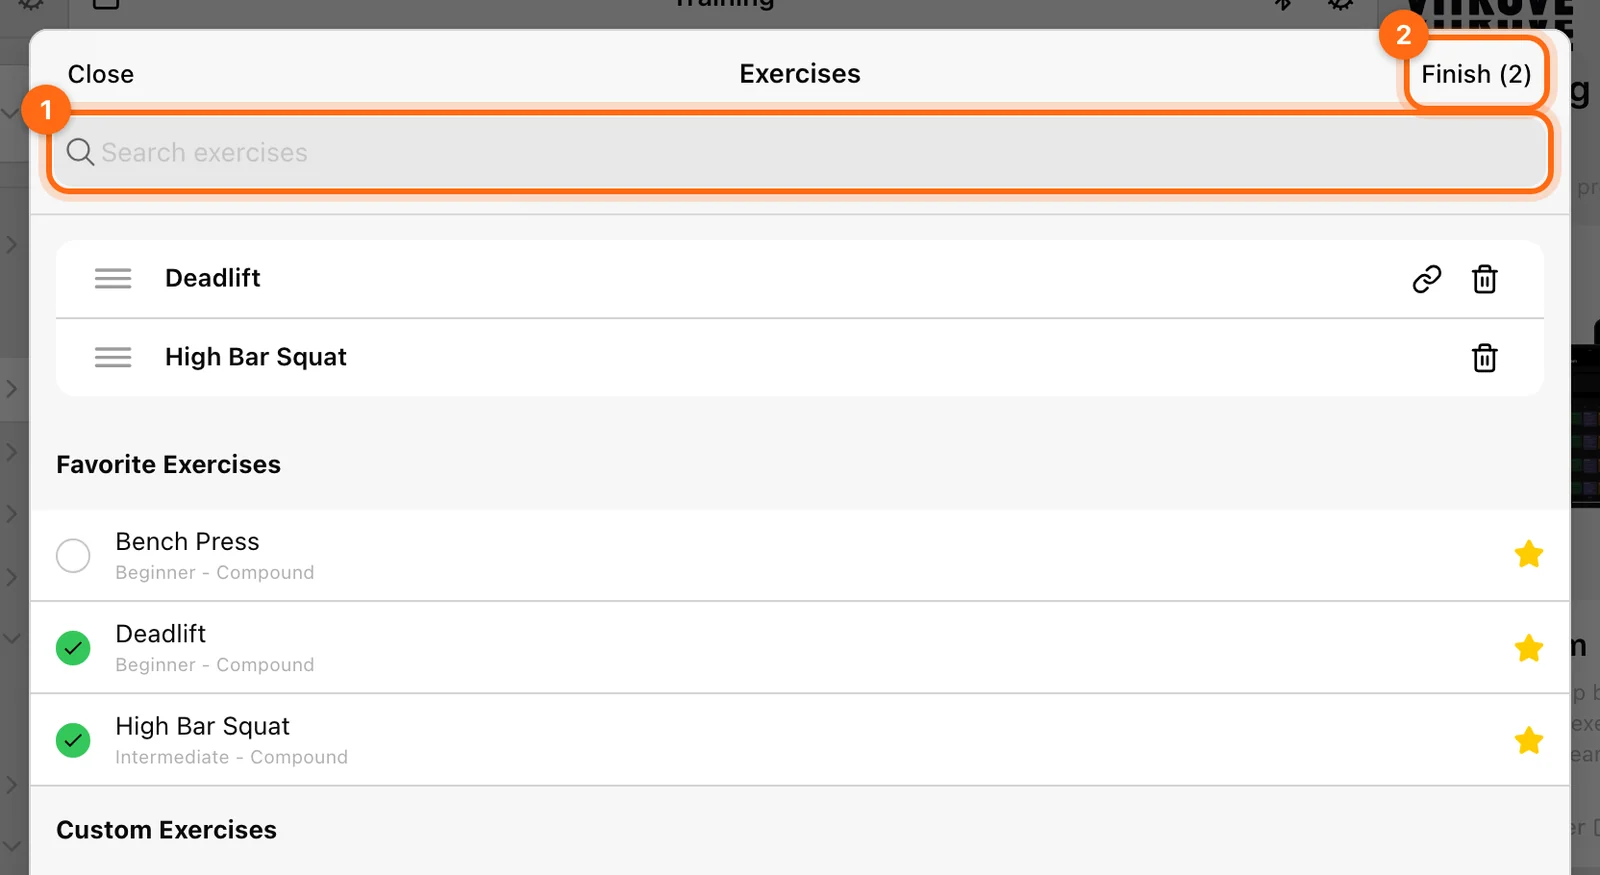
| Add exercises | Your own selection of movements, using their default prescriptions. |
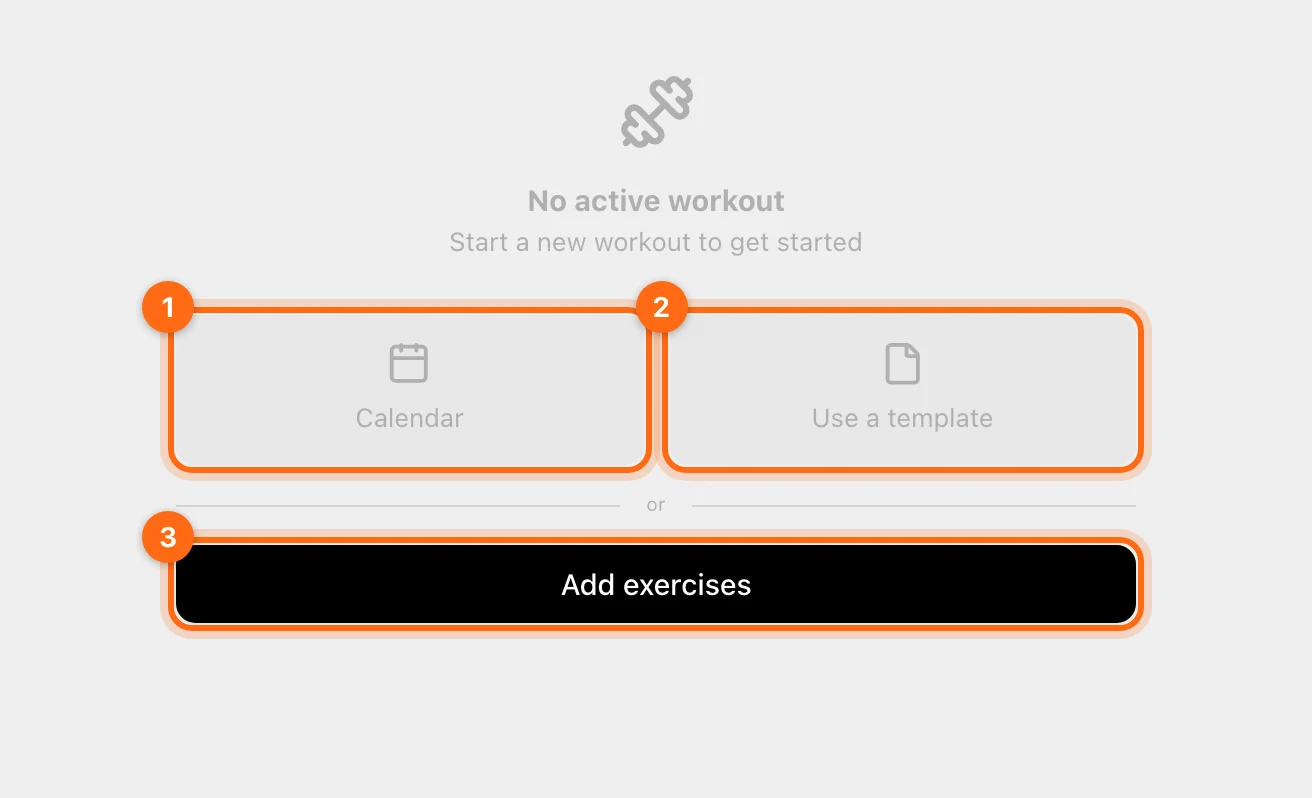
How to choose:
- From scratch gives you full control. Use Add exercises and set the loads and settings yourself. For a lift you only want to track with an encoder, the focused VBT card is quicker. See Record a VBT workout.
- From Calendar suits a structured program your coach has scheduled. Select the session for the day, and its exercises, loads, and settings load automatically, with no setup. Review them before you start. Once finished, the data appears in History and Labs.
- From a template reuses a saved training structure, so sessions stay consistent and quick to set up. Change loads, reps, or exercises if needed before recording.
Quick Tracking on the Training page also connects your encoder for a quick session, but nothing it shows is saved. See Quick Tracking.
In Add exercises, search the Favorites, Custom, or All exercise lists; select the movements and review the selected items. Use the picker’s Finish (number) to load that selection. This Finish closes the exercise chooser—it does not save a completed training session.
3. Read the session before performing it
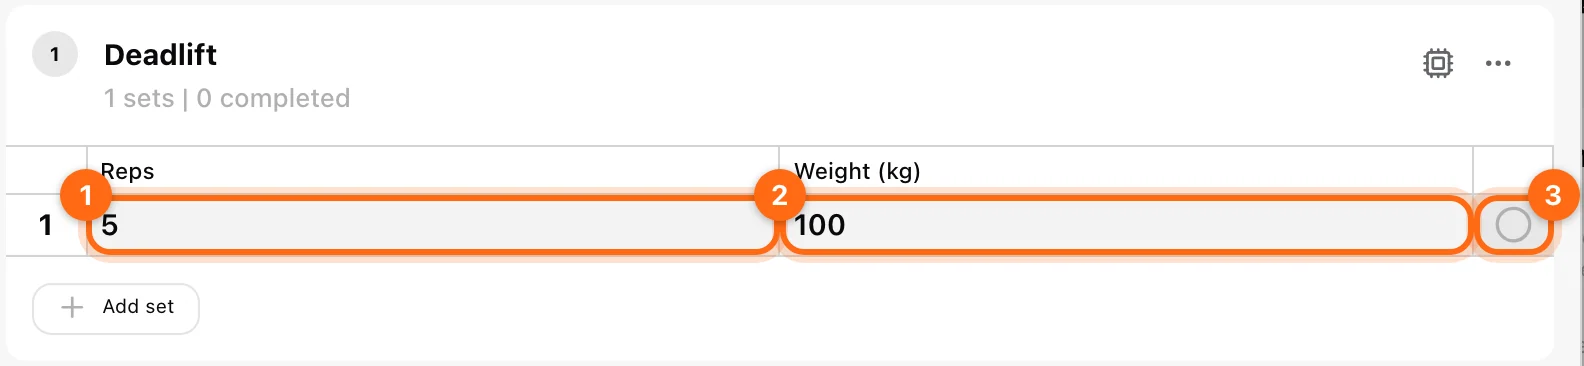
Open an exercise card. The table’s rows are sets and columns are parameters, such as Reps, Weight, Set Rest, or a velocity target. Read any Notes.
- Prescribed values tell you what was intended.
- Executed values record what happened.
- A range gives lower/upper targets.
- % 1RM is a calculated target; record the actual load in the appropriate load field.
Use the full structured-workout guide for manual completion, supersets, tracking-type selection, and the set marker.
4. Record one set
Without a device
Enter the values you performed and use the set’s completion circle. Completing an untouched single-value prescription can copy its target into the executed field, so correct deviations before considering the record accurate.
With a device
Check the active athlete, open exercise, highlighted target set, load/units, and required hardware. Recording starts differently by modality:
- VBT: the first measured rep opens the velocity display.
- Sprint: the device’s start event opens the run display.
- Jump / Reaction: select the intended algorithm if requested, then use Start and wait through Get ready….
Use Finish on the recording display to save/end the set. Return to the exercise and check that its result belongs to the right row.
Manually completed is not device-measured
A completion check can record that a set was performed without captured repetitions. It does not manufacture velocity, jump, split, or reaction events. If those measurements matter, inspect the recorded event breakdown.
5. Continue through the exercises
Record the remaining sets. In a superset, the current target can move between its member exercises; check the highlighted marker and exercise name before the next measured set.
Switch athletes only after the current set is saved or resolved. Each athlete has their own session.
6. Review Summary
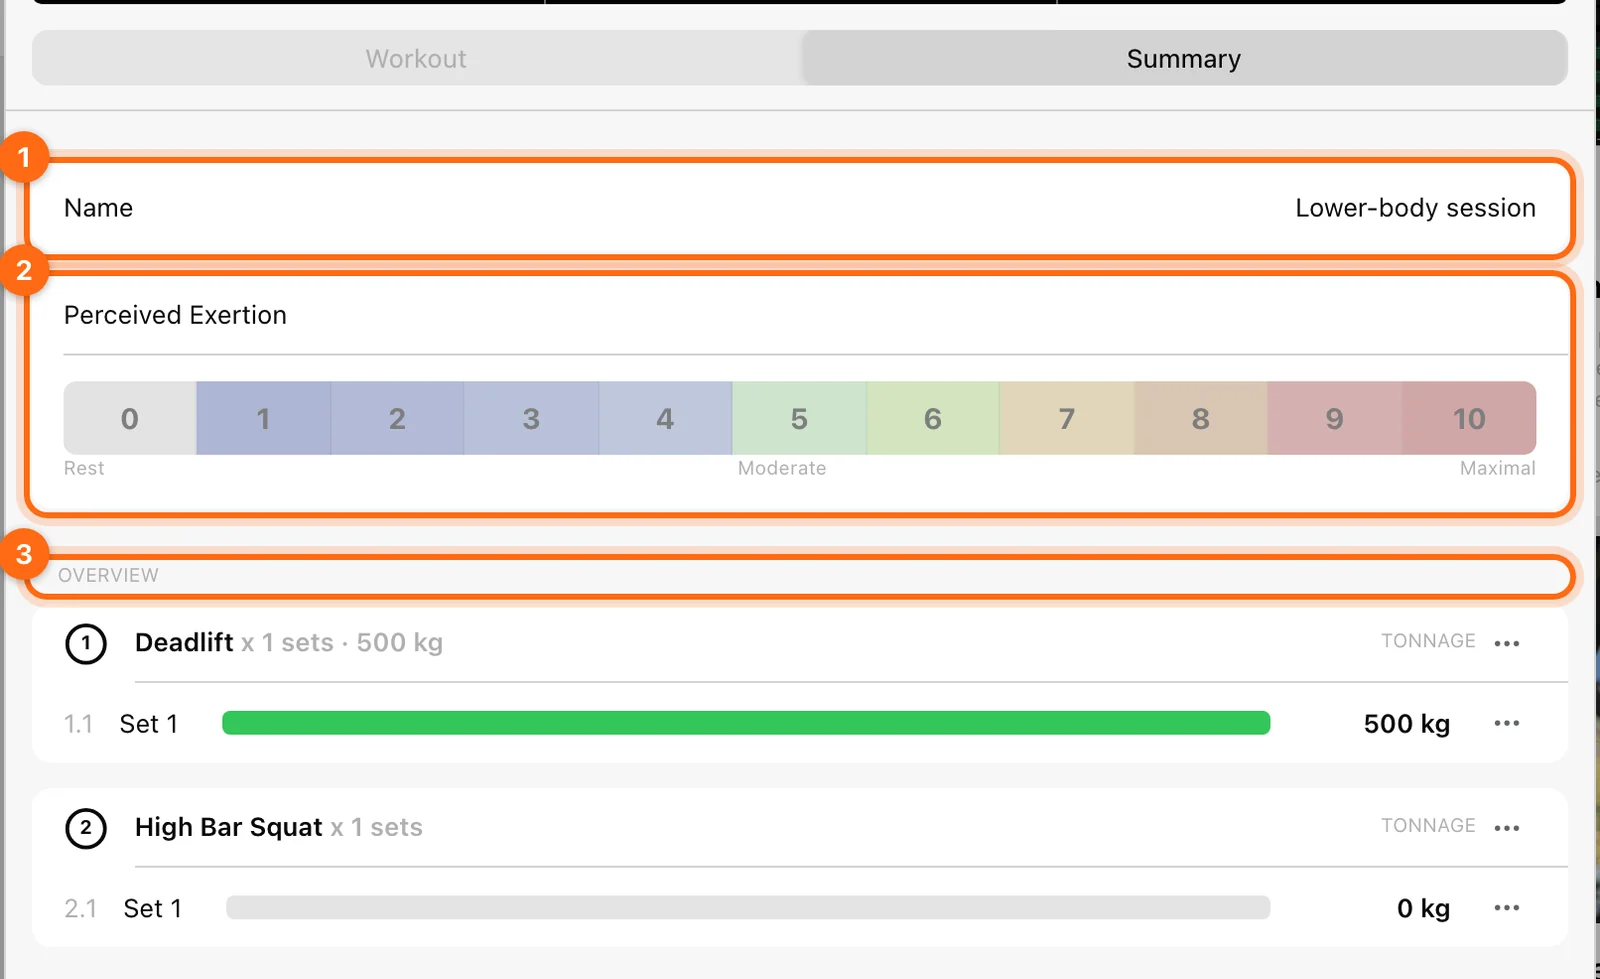
Select Summary, next to Workout. Change Name to something recognizable and set Perceived Exertion (the workout’s RPE) if you use it. Review the Overview for the recorded exercise and set results.
If a value or athlete is wrong, use in-session correction controls while the workout is still active.
7. Finish the workout
Select Finish in the workout footer. In Coach Mode, choose Only this athlete or All athletes, then confirm Finish. Use the one-athlete option unless you intend to end the selected group’s workouts in this flow.
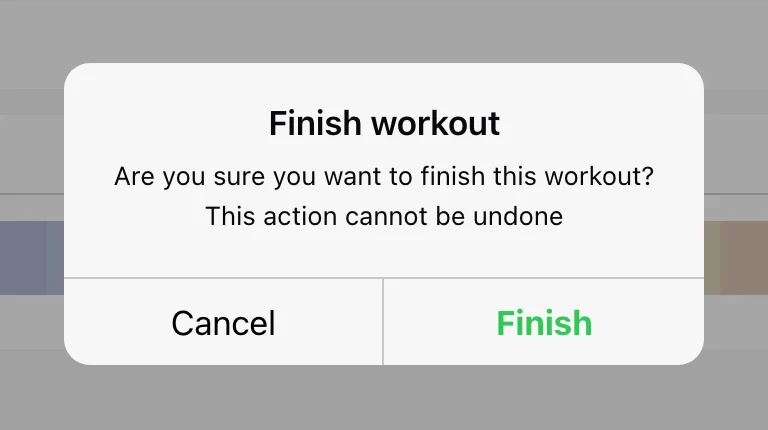
Discard is the destructive alternative. It is not a save-and-close action.
8. Verify the saved result
Allow the background-processing indicator to finish. Inspect Pending workouts if the cloud button remains, then open History in the same organization and athlete context.
Confirm the date, name, exercises, and sets. If the record is missing, keep the original device’s storage intact and follow Find a missing workout.
Understand the Training screen
A complete map of the workout cards, tracking tools, monitoring, measurements, athlete selector, and header actions.
Perform a structured or mixed workout
Understand prescription tables, manual completion, the active-set marker, supersets, and combining lifting, jumps, sprints, and reaction work.