Record jump workouts
Use Vertical Jump, RSI Modified, or 10/5 Jump RSI; configure athlete inputs, wait through calibration, and save the recorded workout.
Training → Jump offers three jump workouts. Choose the appropriate recording protocol, collect sets, and finish the workout into History. You can also include jump exercises in a structured mixed workout.
Jump workouts use Vitruve Force and are available to all Vitruve users, on a phone, an iPad or tablet, or the desktop app. The athlete jumps with the Force tether attached, and the app calculates height, force, and the related metrics from the tether data.
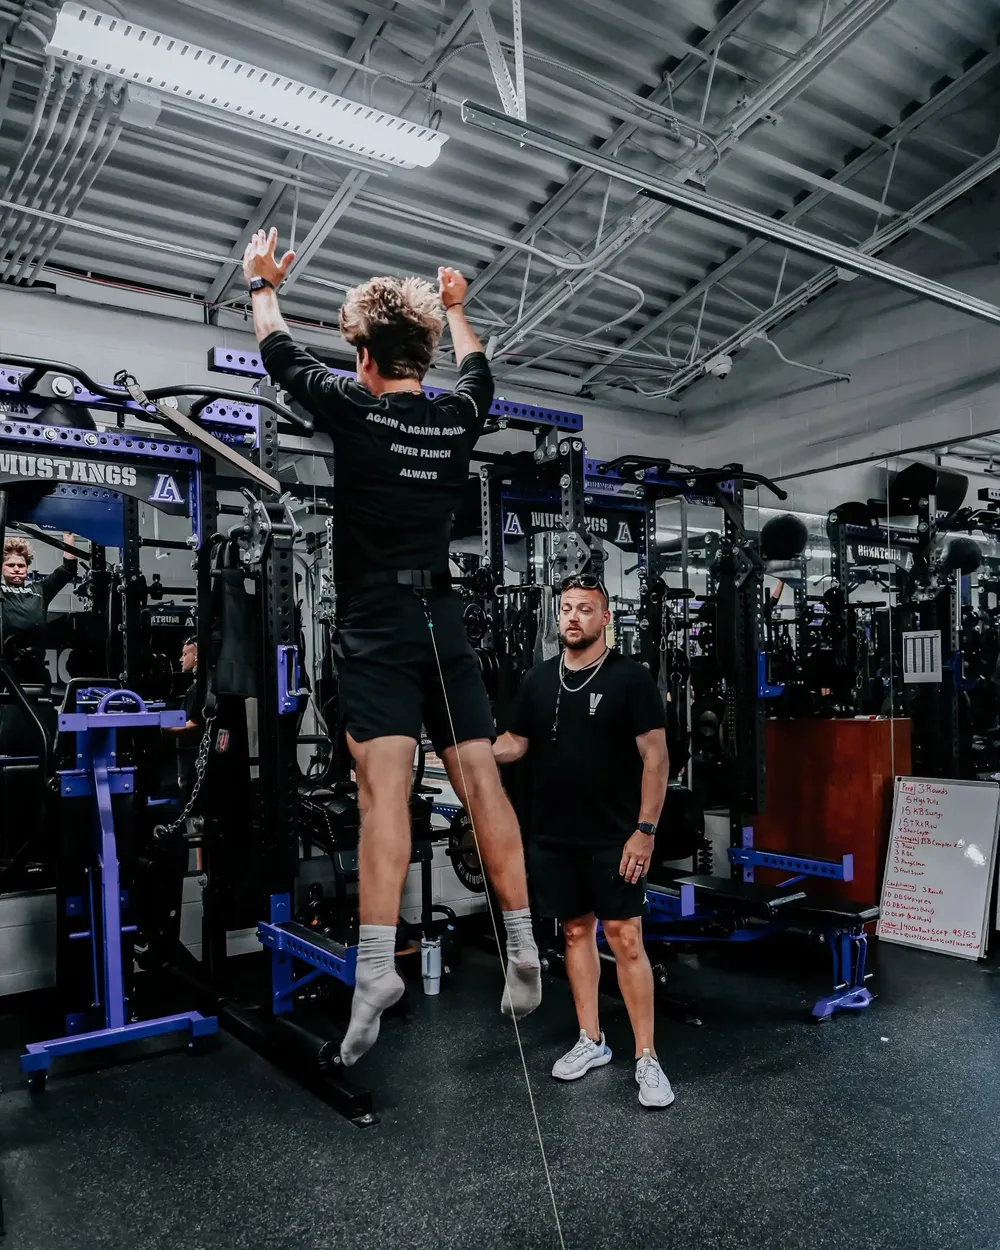
Choose the jump workout
| Option | What the screen emphasizes | What you can configure |
|---|---|---|
| Vertical Jump | The organization’s configured jump metrics; default views emphasize height. | Available primary/secondary/set metric selectors. |
| RSI Modified | Modified RSI, with height and flight time; its set summary uses average modified RSI. | Protocol metrics are fixed rather than editable in the metric picker. |
| 10/5 Jump RSI | The repeated-jump RSI protocol and its protocol-specific result. | Protocol metrics are fixed; the focused workout allows one set. |
These options maintain separate focused-workout contexts. They are not three alternate names for one live set.
What each protocol measures
- Vertical Jump: the athlete performs a countermovement jump. Jump height is the primary metric.
- RSI Modified (mRSI): the same protocol as Vertical Jump. The only difference is that the Modified Reactive Strength Index is the primary metric instead of jump height. All other metrics are the same.
- 10/5 Jump RSI: the athlete performs 11 consecutive jumps without stopping. The app discards the first jump, picks the best 5 of the remaining 10 by RSI, and reports their average reactive strength index. You do not need to count: the recording screen closes automatically once the 11th jump lands.
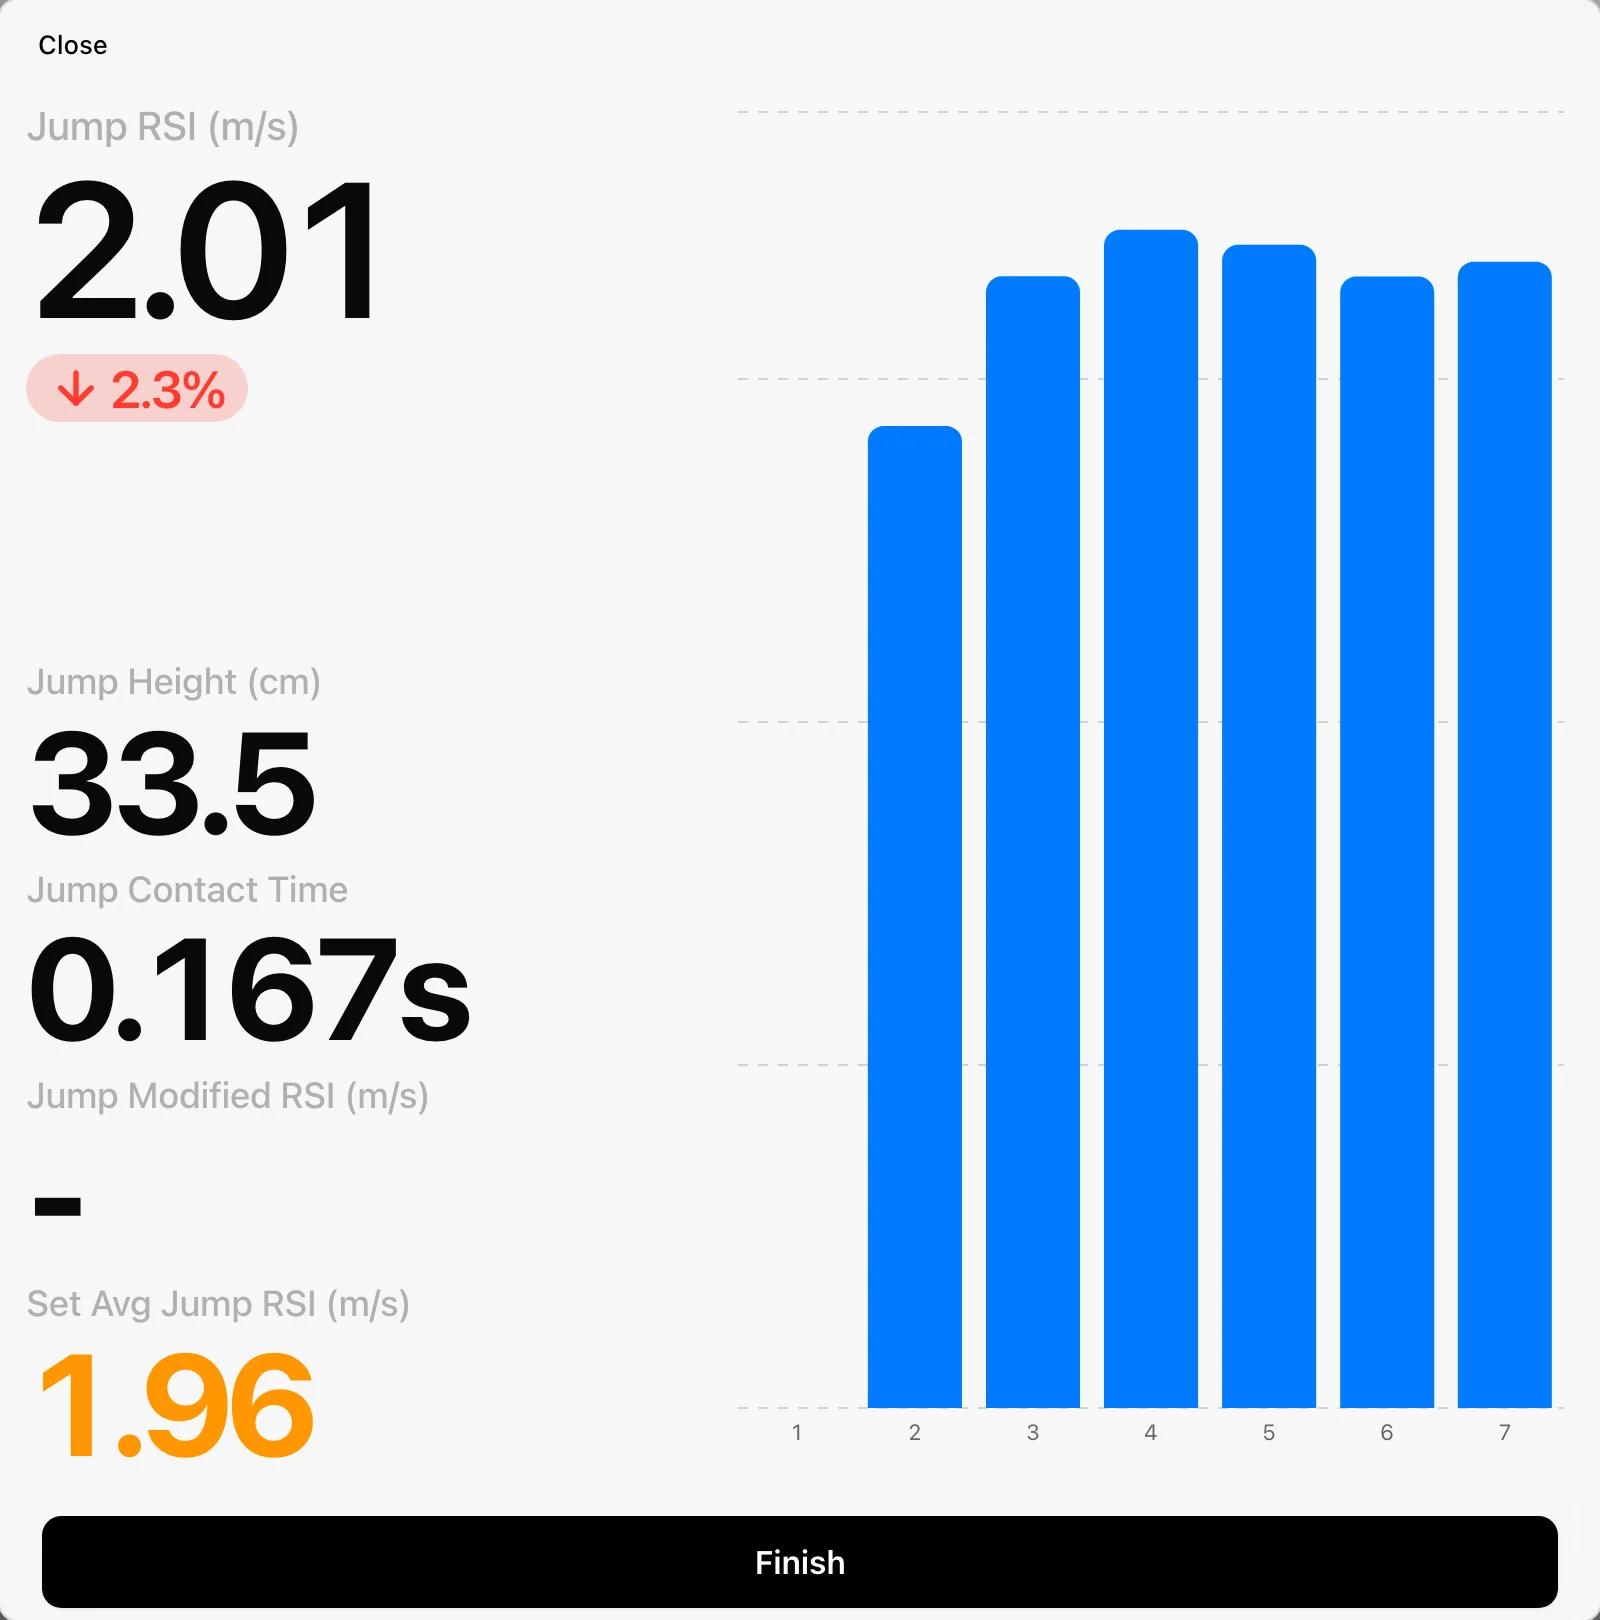
Squat Jump is not offered as a protocol.
1. Select the athlete and compatible device
Check organization and avatar. Connect Vitruve Force / a compatible V4 encoder and make it active. An older encoder can record VBT yet still be incompatible with jump capture.
Attach Vitruve Force to the athlete
- Put a belt around the athlete's hips.
- Clip the tether to the back of the belt.
- Place the Force unit on the ground directly behind the athlete.
There are two belt options:
- Standard belt: connects the tether to the belt with a carabiner or snap hook.
- Magnetic belt: uses a magnetic connector instead. The tether snaps off magnetically, which makes it faster to detach between sets without undoing a clasp.
See Vitruve Force and Force accessories for the hardware.
2. Choose the exercise
Select the header’s Exercise and choose the intended jump movement. The focused picker lists jump-compatible exercises. If the movement is not offered, review its exercise type rather than expecting a general lifting selection to appear here automatically.
Besides the standard movements, such as a countermovement jump with hands on hips or with free arms, you can create custom jump exercises, for example a left-leg jump, right-leg jump, banded jump, or weighted jump. Create the exercise in the exercise library and turn on Jump under Exercise type.
Use the History control for the selected movement’s progress, with the appropriate jump context. The VBT ROM/1RM settings are not the jump-workout settings.
3. Distinguish Body weight and Load
- Body weight is the athlete’s own mass, shown in a separate row. If it says Tap to add, enter the correct value and unit.
- Load is external added weight, such as a vest or belt. Use 0 for an unloaded jump.
For example, an athlete’s body mass belongs in Body weight; only their added vest load belongs in Load. Do not add the two together and put the total in the Load card.
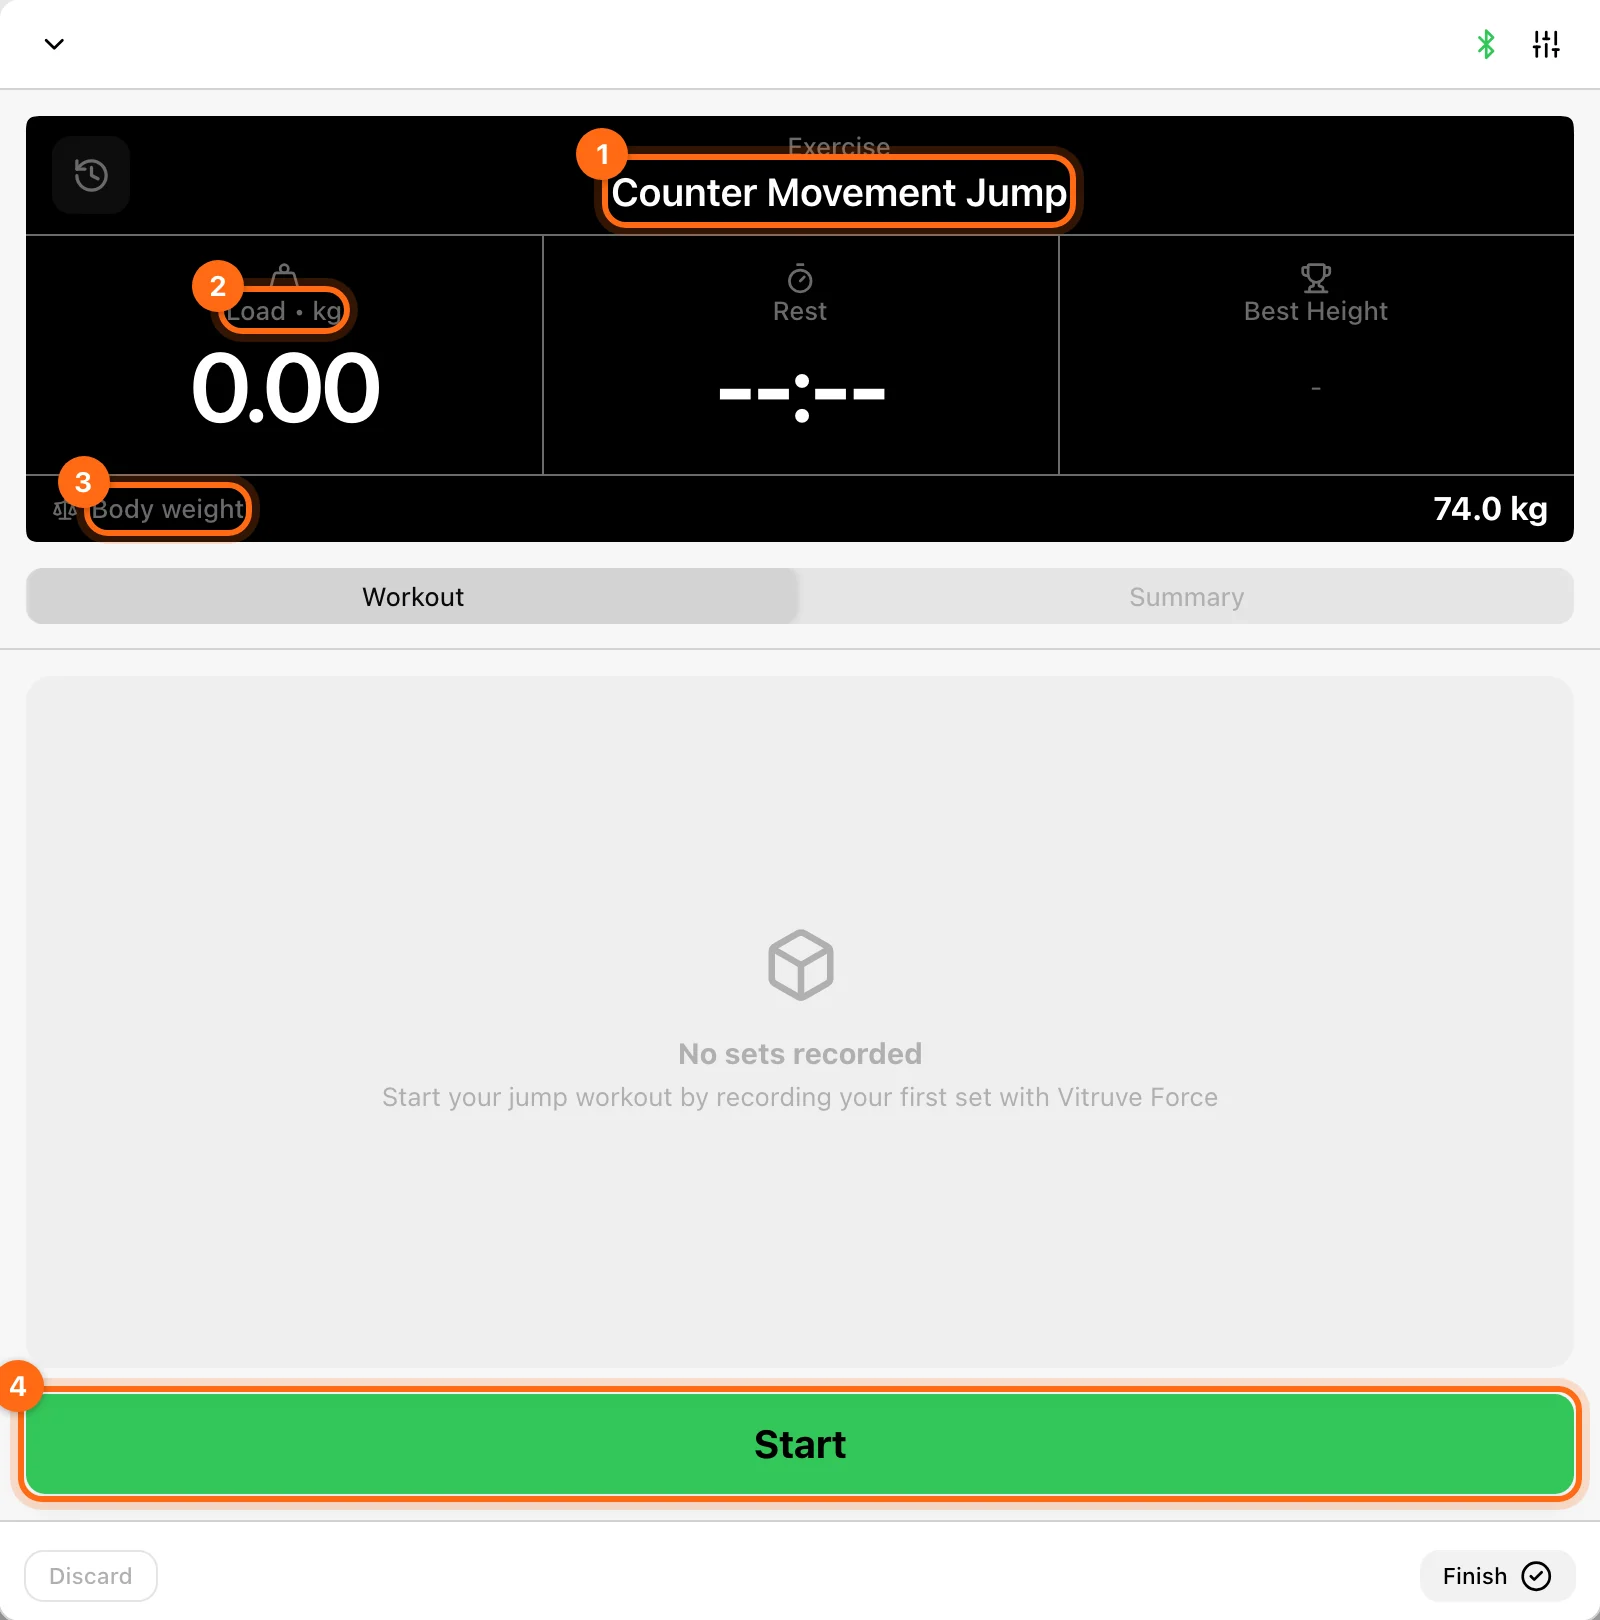
The session Body weight row can override the value used for the current athlete’s recording. To maintain a dated measurement record, use Training → Measurements as well.
Body weight supports mass-dependent outputs such as force/power. It is not a reason to substitute zero as a known mass, and its absence does not mean every kinematic jump measurement must be blocked. Enter it accurately before relying on those calculated outputs.
4. Start and wait through Get ready
Make sure the athlete is standing still in their starting position. Select Start. The button counts down through Get ready…, then the recording display opens. This is also the device’s standing-baseline calibration window, which measures the starting offset: stay ready and wait until the countdown ends before beginning the movement.
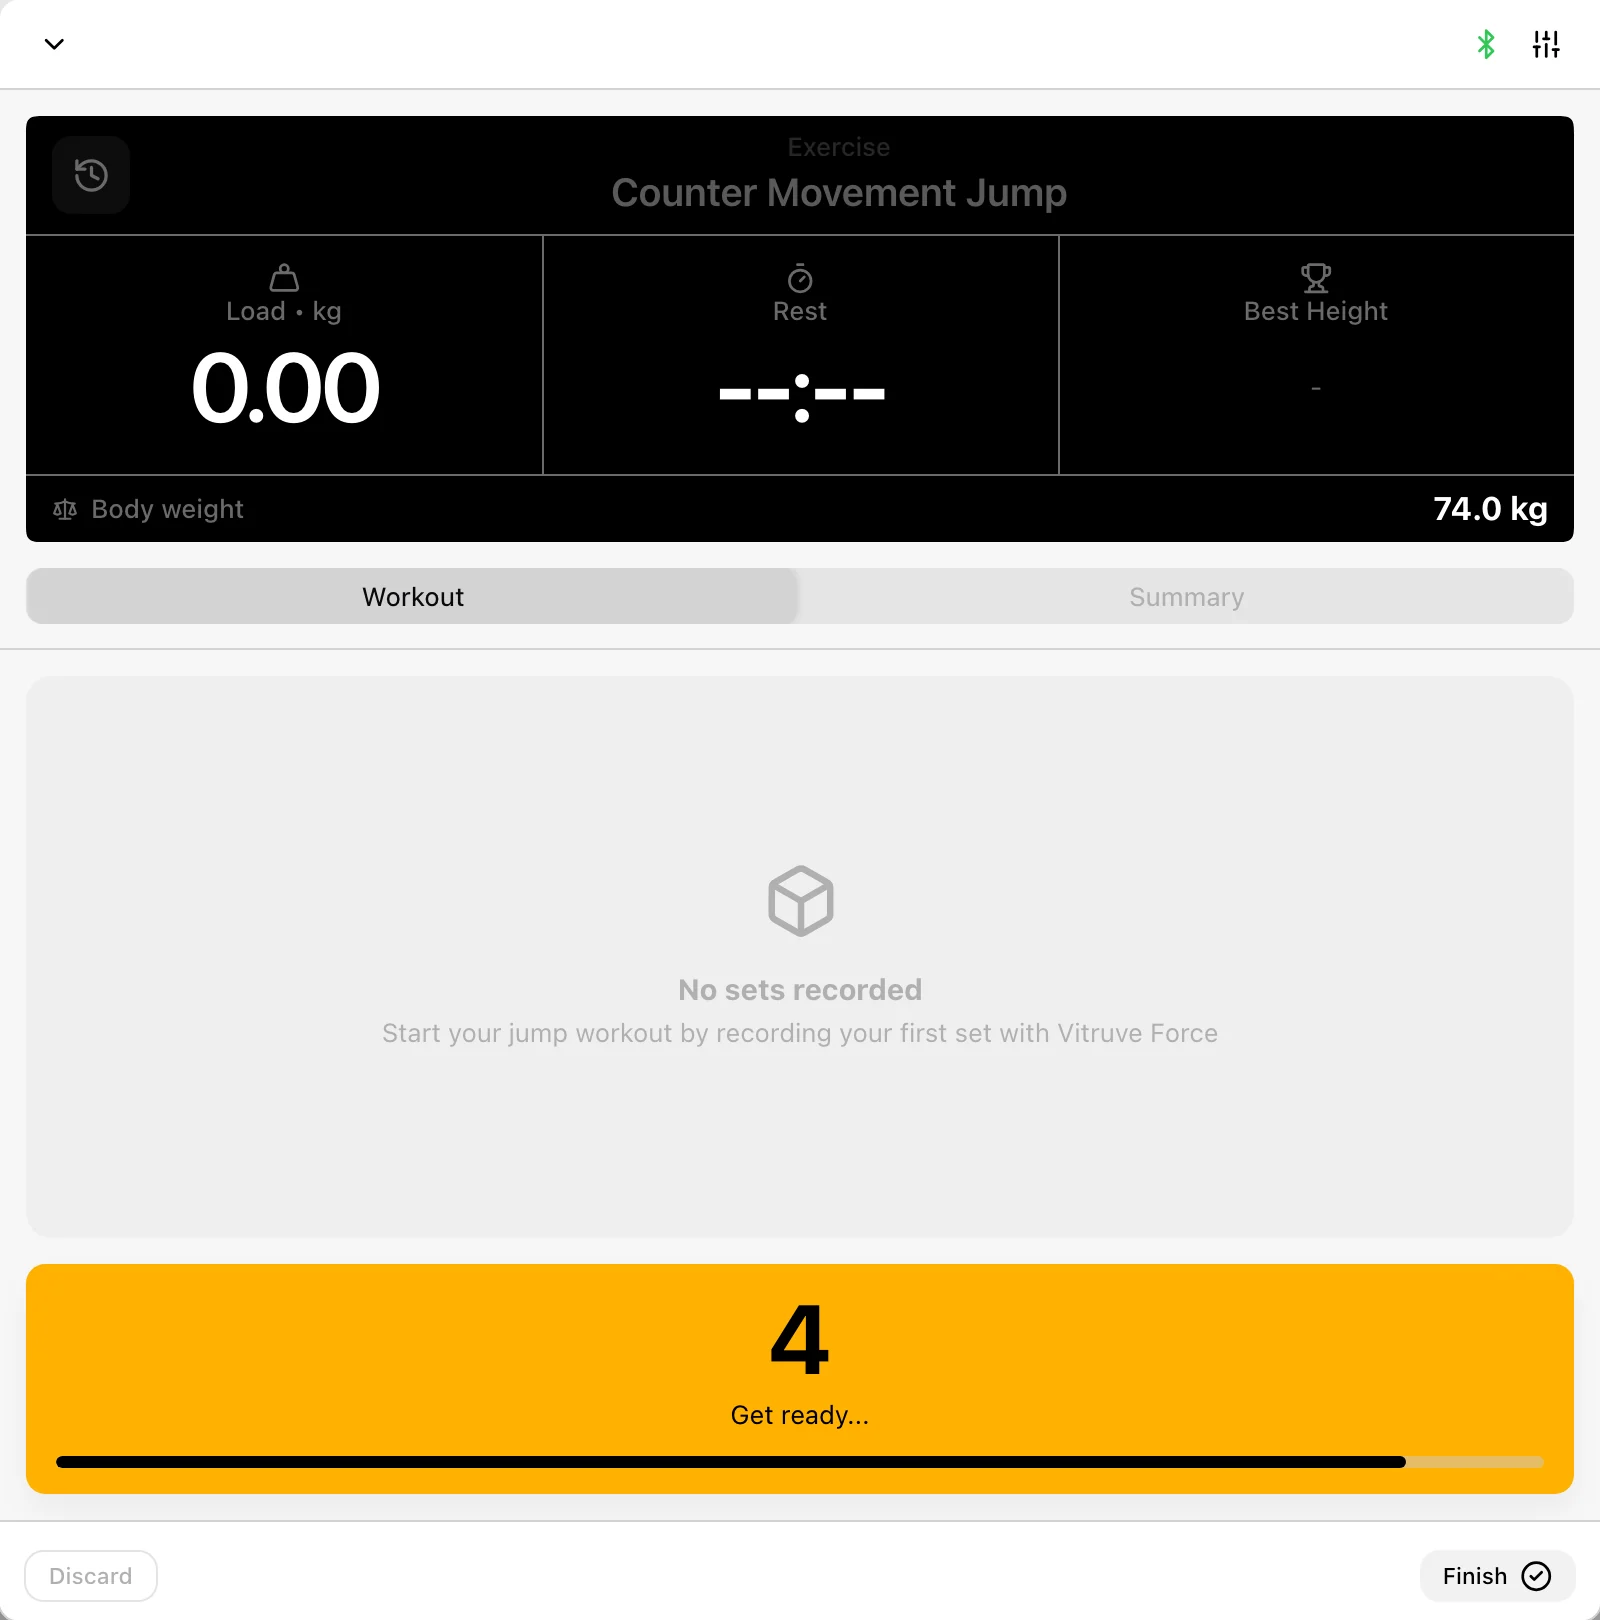
The exercise, load, and settings are protected during the countdown/recording. Complete or resolve the current set before changing its setup or athlete.
5. Record and finish the set
Perform the intended jumps using the selected protocol.
Return to standing after every jump
A jump is only recorded when the athlete returns to the standing position after landing. Finish each rep in exactly the same position you started from. If a jump still does not register, pull the tether slightly to reset it.
Review the current metric, jump chart, and secondary/set outputs. Select the display’s Finish to commit the captured jumps and return to the workout.
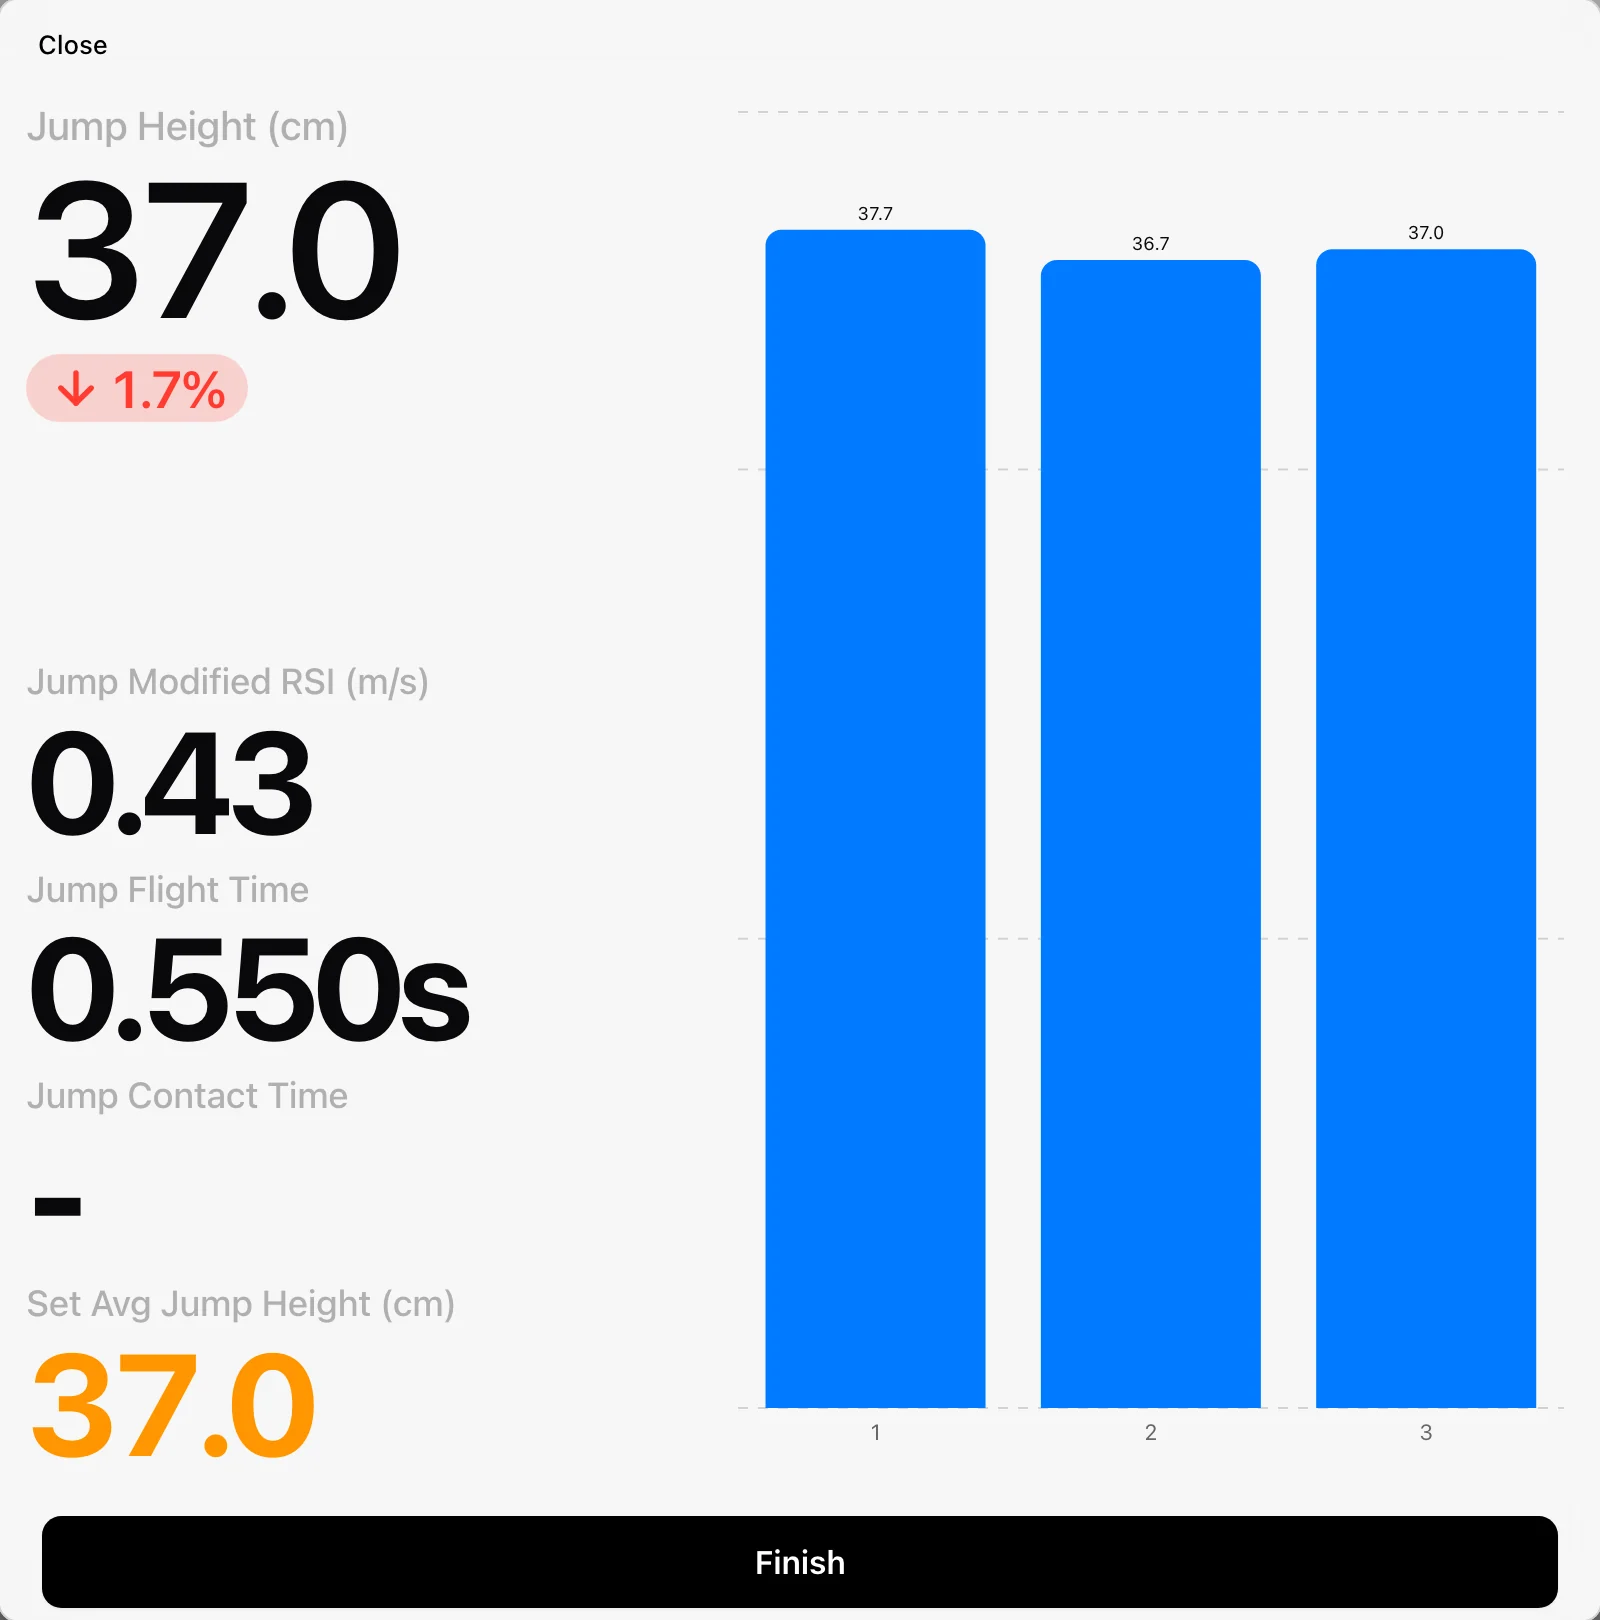
If you leave an unfinished display after jumps have been captured, Stop set offers:
- Save: keep the recorded jumps in this workout.
- Discard: drop that unfinished captured set.
- Cancel: keep the recording display open.
That set-level discard is different from the whole-workout Discard in the footer.
6. Review the set and continue
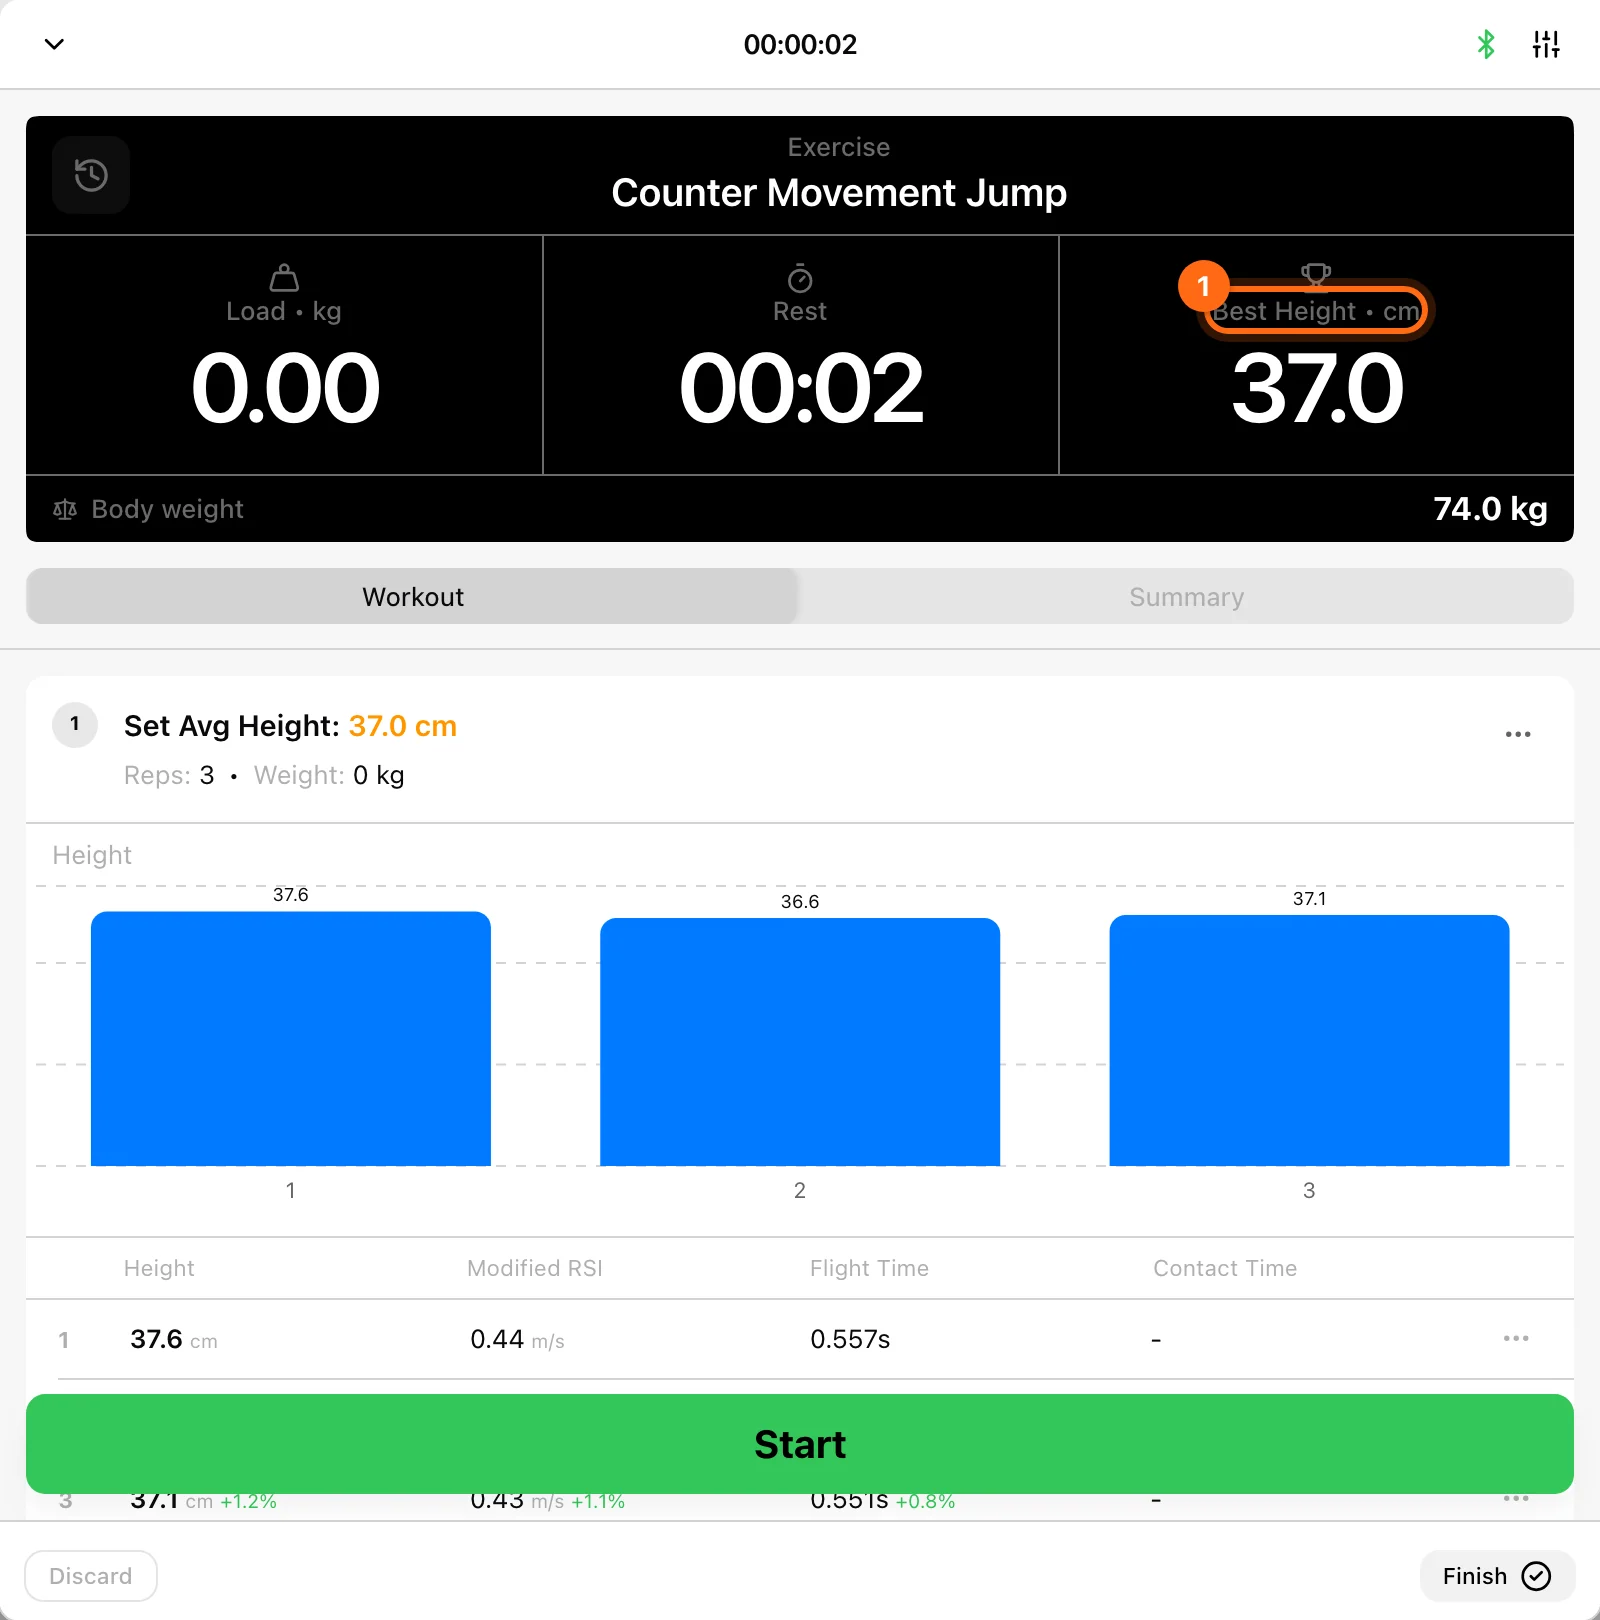
After a set, the header's Best card shows the session's best set by the protocol's set metric. For Vertical Jump that is Best Height, the highest set average jump height; each set's row shows its own Set Avg Height. Height follows your measurement units, cm or inches. See Units and appearance.
Expand the recorded set to inspect individual jumps and the chosen protocol’s metrics. Select a single jump to see its force–time detail. Metrics include:
| Metric | What it measures |
|---|---|
| Hip position | Position curve over time: the unweighting phase, peak height, and landing. |
| Velocity | Velocity over time during the jump. |
| Force | Force curve, close to zero during flight. |
| Peak Power | Maximum power output. |
| Positive Impulse | Force applied once it rises above the standing baseline. |
| Mean Force | Average force across the jump. |
| Relative Peak Force | Peak force relative to body weight. |
| Contraction Time | Time on the ground from the start of unweighting to takeoff. |
| Flight Time | Time in the air. |
| Time to Peak Power | Time from the start of the concentric phase to peak power. |
| Time to Peak Velocity | Time from the start of the concentric phase to peak velocity. |
Force, power, and impulse depend on an accurate Body weight. Use available Details, Repetitions, load correction, Copy, or Delete controls as appropriate.
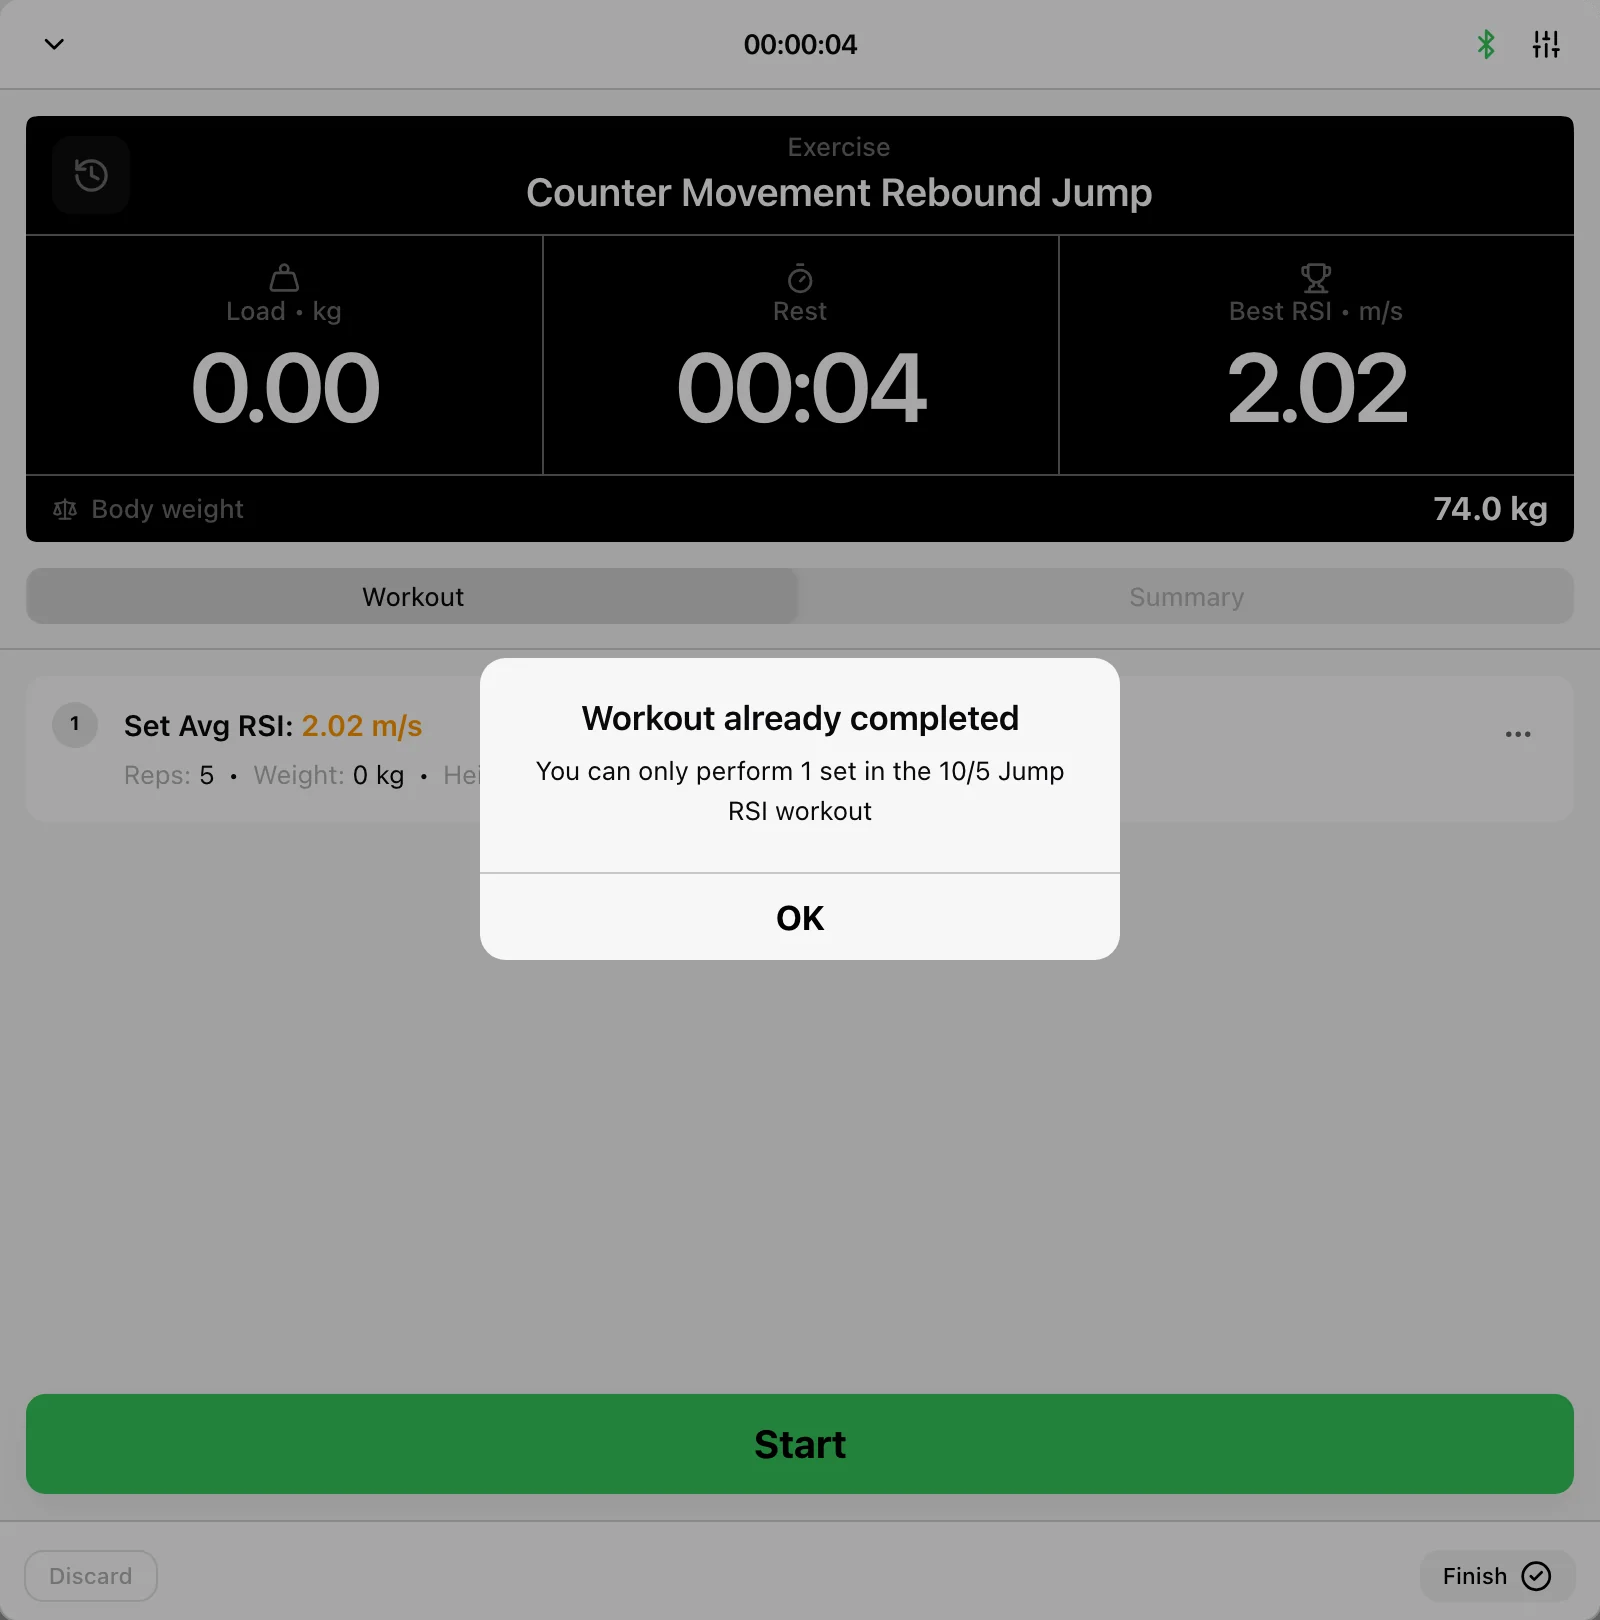
Vertical Jump and RSI Modified can continue with further sets in their focused workout. 10/5 Jump RSI displays Workout already completed when you try to start another set: save/finish that workout and begin a new one if you need another separate attempt. This is not a failed Bluetooth connection.
Understand mRSI
The Modified Reactive Strength Index compares jump height with contraction time, the time on the ground from the start of unweighting to takeoff.
- An athlete who jumps high and spends less time on the ground has a higher mRSI.
- An athlete who jumps the same height but takes longer on the ground has a lower mRSI.
mRSI is especially useful for tracking readiness day to day, because it reflects how fresh and explosive the athlete is.
7. Finish the workout
Open Summary to review all recorded work and Name/RPE. Select the workout footer’s Finish and confirm the intended athlete scope. Verify the resulting jump workout in History after upload.
If Start is not ready
Check the active compatible encoder, exercise selection, body-weight context still loading for the current athlete, and whether a countdown/set is already in progress. Settings availability differs by protocol; fixed RSI metrics do not indicate a missing plan entitlement.
If measurements are missing after starting, check that you waited through calibration, then use Connection or Measurement troubleshooting.
Track other movements with Force
Vitruve Force is not limited to jump workouts. Use Training → Realtime Monitor to track any movement live, such as horizontal jumps, punches, or a landmine press, and export the raw data to CSV. See Quick Tracking and Realtime Monitor.